Configure Virtual Network Connectivity using Peering

In this lab, you assume the role of an Azure® administrator. First, you will create an Azure virtual network by using the Azure portal. Next, you will create an Azure virtual network by using Azure Cloud Shell. Finally, you will configure virtual network peering connections for secure bidirectional communication.

45
M
Time
Beginner
difficulty
ceu/cpe

Course Content

No items found.
No items found.
Course Description

Network traffic within peered virtual networks is isolated. For instance, no public Internet, gateways, or encryption is needed in the interaction between the virtual networks. The advantage of utilizing virtual network peering is that it gives a low-latency, high-bandwidth connection between resources in various virtual networks.

In this hands-on lab, learners will create a virtual network using Azure Cloud Shell and Azure CLI and configured VNet peering between virtual networks for secure communication. The other guided challenges in this series are “Configure Authentication with Web Apps” and “Can you Configure Network Security Groups (NSGs) to allow Application and Database traffic?”

Understand the Scenario

In this virtual lab, you are a system administrator for a company that is migrating its web services from its own datacenter to Azure. You need to create and deploy multiple Azure Virtual Networks using VNet peering for secure bidirectional communication, as a proof of concept. To accomplish this task, you are provided with an Azure resource group that initially contains no resources. Your job is to create the necessary resources to complete the challenge.

Create a virtual network for a web server tier using the Azure portal

An Azure Virtual Network (VNet) is a copy of your network in the cloud. It is a legal separation of the Azure cloud assigned to your subscription. When you build a VNet, your settings and VMs within your VNet can interact quickly and securely with each other in the cloud. In this first section of the virtual lab, learners will learn how to create a virtual network for a web server tier. For this, they will first sign in to the Azure portal and create a virtual network named VNet1-11874770. After this, they will configure the virtual network to use address space 10.0.0.0/16 and have a subnet called Web for IP address range 10.0.1.0/24. Finally, they will check a virtual network named VNet1-11874770 exists or not, and has a subnet called Web for IP address range 10.0.1.0/24.

Create a virtual network for an application server tier using Azure Cloud Shell and Azure CLI

Azure Cloud Shell is used to maintain and develop Azure resources. Cloud Shell gives a browser-accessible, pre-configured shell background for running Azure resources without the burden of installing, versioning, and managing a machine yourself. In this section of the virtual lab, you will again create a virtual network for an application server tier using Azure Cloud Shell and Azure CLI. For this, you will launch Azure Cloud Shell and create a Storage Account and file share for Cloud Shell in the existing resource group by using the advanced settings option. After this, you will name the Storage Account and name the file share. Next, in the Azure Cloud Shell, you will learn how to create a virtual network named VNet2-11874770 using Azure CLI and configure the virtual network to use address space 10.10.0.0/16 and a subnet named App for IP address range 10.10.1.0/24.

Configure VNet peering between the virtual networks for secure bidirectional communication

VNet peering is a method that joins two virtual networks (VNets) in the same area through the Azure network. Once peered, the two virtual networks emerge as one for all connectivity goals. It is a logical and crucial isolation of Azure, which allows you to join Azure resources securely. In this section of the virtual lab, learners will learn how to configure VNet peering for secure communication. For this, you will create VNet peering for VNet1-11874770 and VNet2-11874770. For secure bidirectional communication, learners will ensure that the VNet peering for VNet1 points to VNet2 and that the VNet peering for VNet2 points to VNet1. After this, they will name the peering for VNet1 VNet1-to-VNet2, and name the peering for VNet2 VNet2-to-VNet1. For each peering, learners will allow virtual network access and allow forwarded traffic. Finally, you will check that VNet peering is active for both virtual networks, with VNet1 pointing to VNet2 and VNet2 pointing to VNet1 and VNet peering status is Connected.

Lab Summary Conclusion

After completing the “Configure Virtual Network Connectivity using Peering” virtual lab, you will have accomplished the following:

  • Created a virtual network for a web server tier using the Azure portal.
  • Created a virtual network for an application server tier using Azure Cloud Shell and Azure CLI.
  • Configured VNet peering between virtual networks for secure bidirectional communication.
This course is part of a Career Path:
No items found.

Instructed by

Instructor
Elizabeth Sims
Provider
Cybrary Logo
Certification Body
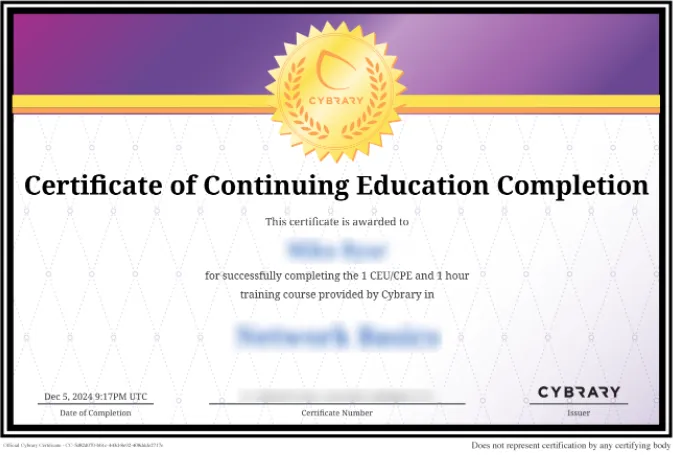
Certificate of Completion

Complete this entire course to earn a Configure Virtual Network Connectivity using Peering Certificate of Completion

Course
This is some text inside of a div block.

Configure Virtual Network Connectivity using Peering

Course

In this lab, you assume the role of an Azure® administrator. First, you will create an Azure virtual network by using the Azure portal. Next, you will create an Azure virtual network by using Azure Cloud Shell. Finally, you will configure virtual network peering connections for secure bidirectional communication.

Path Releasing Q2 2025
Full access included with 
Insider Pro
 and 
Teams

H

45

M
Time

Beginner

i
This is some text inside of a div block.
Experience Level

i

This is some text inside of a div block.
CEU's

1

Enrollees

Heading

H

Heading

M
Time

Heading

i
This is some text inside of a div block.
Experience Level

Heading

i

This is some text inside of a div block.
CEU's

Heading

Enrollees

Learners at 96% of Fortune 1000 companies trust Cybrary

About this course

In this lab, you assume the role of an Azure® administrator. First, you will create an Azure virtual network by using the Azure portal. Next, you will create an Azure virtual network by using Azure Cloud Shell. Finally, you will configure virtual network peering connections for secure bidirectional communication.
Read More

Course Description

Network traffic within peered virtual networks is isolated. For instance, no public Internet, gateways, or encryption is needed in the interaction between the virtual networks. The advantage of utilizing virtual network peering is that it gives a low-latency, high-bandwidth connection between resources in various virtual networks.

In this hands-on lab, learners will create a virtual network using Azure Cloud Shell and Azure CLI and configured VNet peering between virtual networks for secure communication. The other guided challenges in this series are “Configure Authentication with Web Apps” and “Can you Configure Network Security Groups (NSGs) to allow Application and Database traffic?”

Understand the Scenario

In this virtual lab, you are a system administrator for a company that is migrating its web services from its own datacenter to Azure. You need to create and deploy multiple Azure Virtual Networks using VNet peering for secure bidirectional communication, as a proof of concept. To accomplish this task, you are provided with an Azure resource group that initially contains no resources. Your job is to create the necessary resources to complete the challenge.

Create a virtual network for a web server tier using the Azure portal

An Azure Virtual Network (VNet) is a copy of your network in the cloud. It is a legal separation of the Azure cloud assigned to your subscription. When you build a VNet, your settings and VMs within your VNet can interact quickly and securely with each other in the cloud. In this first section of the virtual lab, learners will learn how to create a virtual network for a web server tier. For this, they will first sign in to the Azure portal and create a virtual network named VNet1-11874770. After this, they will configure the virtual network to use address space 10.0.0.0/16 and have a subnet called Web for IP address range 10.0.1.0/24. Finally, they will check a virtual network named VNet1-11874770 exists or not, and has a subnet called Web for IP address range 10.0.1.0/24.

Create a virtual network for an application server tier using Azure Cloud Shell and Azure CLI

Azure Cloud Shell is used to maintain and develop Azure resources. Cloud Shell gives a browser-accessible, pre-configured shell background for running Azure resources without the burden of installing, versioning, and managing a machine yourself. In this section of the virtual lab, you will again create a virtual network for an application server tier using Azure Cloud Shell and Azure CLI. For this, you will launch Azure Cloud Shell and create a Storage Account and file share for Cloud Shell in the existing resource group by using the advanced settings option. After this, you will name the Storage Account and name the file share. Next, in the Azure Cloud Shell, you will learn how to create a virtual network named VNet2-11874770 using Azure CLI and configure the virtual network to use address space 10.10.0.0/16 and a subnet named App for IP address range 10.10.1.0/24.

Configure VNet peering between the virtual networks for secure bidirectional communication

VNet peering is a method that joins two virtual networks (VNets) in the same area through the Azure network. Once peered, the two virtual networks emerge as one for all connectivity goals. It is a logical and crucial isolation of Azure, which allows you to join Azure resources securely. In this section of the virtual lab, learners will learn how to configure VNet peering for secure communication. For this, you will create VNet peering for VNet1-11874770 and VNet2-11874770. For secure bidirectional communication, learners will ensure that the VNet peering for VNet1 points to VNet2 and that the VNet peering for VNet2 points to VNet1. After this, they will name the peering for VNet1 VNet1-to-VNet2, and name the peering for VNet2 VNet2-to-VNet1. For each peering, learners will allow virtual network access and allow forwarded traffic. Finally, you will check that VNet peering is active for both virtual networks, with VNet1 pointing to VNet2 and VNet2 pointing to VNet1 and VNet peering status is Connected.

Lab Summary Conclusion

After completing the “Configure Virtual Network Connectivity using Peering” virtual lab, you will have accomplished the following:

  • Created a virtual network for a web server tier using the Azure portal.
  • Created a virtual network for an application server tier using Azure Cloud Shell and Azure CLI.
  • Configured VNet peering between virtual networks for secure bidirectional communication.

Train Your Team

Cybrary’s expert-led cybersecurity courses help your team remediate skill gaps and get up-to-date on certifications. Utilize Cybrary to stay ahead of emerging threats and provide team members with clarity on how to learn, grow, and advance their careers within your organization.

Included in a Path

Elizabeth Sims
Cloud Security Architect
Read Full Bio
Learn

Learn core concepts and get hands-on with key skills.

Practice

Exercise your problem-solving and creative thinking skills with security-centric puzzles

Prove

Assess your knowledge and skills to identify areas for improvement and measure your growth

Get Hands-on Learning

Put your skills to the test in virtual labs, challenges, and simulated environments.

Measure Your Progress

Track your skills development from lesson to lesson using the Cybrary Skills Tracker.

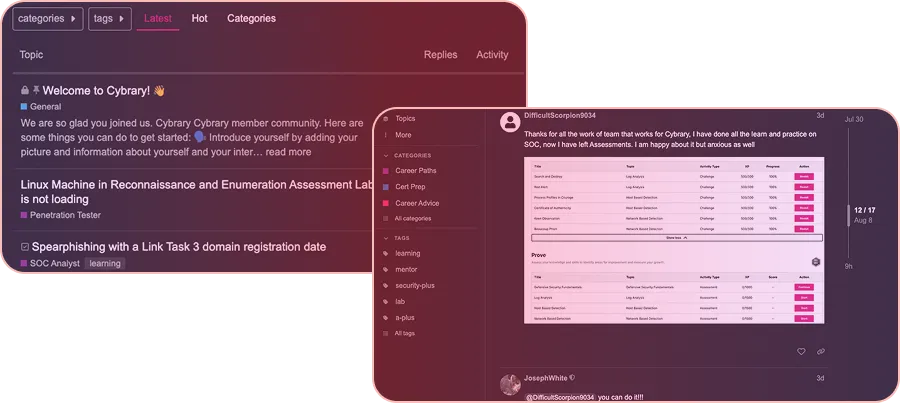
Connect with the Community

Connect with peers and mentors through our supportive community of cybersecurity professionals.

Success from Our Learners

"Becoming a Cybrary Insider Pro was a total game changer. Cybrary was instrumental in helping me break into cybersecurity, despite having no prior IT experience or security-related degree. Their career paths gave me clear direction, the instructors had real-world experience, and the virtual labs let me gain hands-on skills I could confidently put on my resume and speak to in interviews."

Cassandra

Information Security Analyst/Cisco Systems

"I was able to earn both my Security+ and CySA+ in two months. I give all the credit to Cybrary. I’m also proud to announce I recently accepted a job as a Cyber Systems Engineer at BDO... I always try to debunk the idea that you can't get a job without experience or a degree."

Casey

Cyber Systems Engineer/BDO

"Cybrary has helped me improve my hands-on skills and pass my toughest certification exams, enabling me to achieve 13 advanced certifications and successfully launch my own business. I love the practice tests for certification exams, especially, and appreciate the wide-ranging training options that let me find the best fit for my goals"

Angel

Founder,/ IntellChromatics.

"Cybrary really helped me get up to speed and acquire a baseline level of technical knowledge. It offers a far more comprehensive approach than just learning from a book. It actually shows you how to apply cybersecurity processes in a hands-on way"

Don Gates

Principal Systems Engineer/SAIC

"Cybrary’s SOC Analyst career path was the difference maker, and was instrumental in me landing my new job. I was able to show the employer that I had the right knowledge and the hands-on skills to execute the role."

Cory

Cybersecurity analyst/

"I was able to earn my CISSP certification within 60 days of signing up for Cybrary Insider Pro and got hired as a Security Analyst conducting security assessments and penetration testing within 120 days. This certainly wouldn’t have been possible without the support of the Cybrary mentor community."

Mike

Security Engineer and Pentester/

"Becoming a Cybrary Insider Pro was a total game changer. Cybrary was instrumental in helping me break into cybersecurity, despite having no prior IT experience or security-related degree. Their career paths gave me clear direction, the instructors had real-world experience, and the virtual labs let me gain hands-on skills I could confidently put on my resume and speak to in interviews."

Cassandra

Information Security Analyst/Cisco Systems

"I was able to earn both my Security+ and CySA+ in two months. I give all the credit to Cybrary. I’m also proud to announce I recently accepted a job as a Cyber Systems Engineer at BDO... I always try to debunk the idea that you can't get a job without experience or a degree."

Casey

Cyber Systems Engineer/BDO

"Cybrary has helped me improve my hands-on skills and pass my toughest certification exams, enabling me to achieve 13 advanced certifications and successfully launch my own business. I love the practice tests for certification exams, especially, and appreciate the wide-ranging training options that let me find the best fit for my goals"

Angel

Founder,/ IntellChromatics.