Free

Use Managed Identities

This IT Pro Challenge lab teaches you how to use the Azure portal to provision a virtual machine, assign it a role, and enable system-assigned managed identity. You will also grant permissions to that managed identity as well as verify a managed identity access token. Finally, you will learn how to remove permissions.

0
45
M
Time
Beginner
difficulty
1
ceu/cpe

Course Content

No items found.
No items found.
Course Description

In this IT Pro Challenge, you will use the Azure portal and Remote Desktop Protocol (RDP) to create and verify a virtual machine with a system-assigned managed identity. You will also assign a role to the virtual machine, which grants permissions to the managed identity and make a request to the managed identity to receive an access token. This lab helps develop knowledge of network access, identity, and access management, which is important for careers in system administration, system security, or as a database administrator.

Overview

The scenario for this virtual lab is that you are a system administrator, and your company is migrating its web services from an on-premise datacenter to Azure. Your job is to deploy an Azure virtual machine and enable managed identities. As proof of concept, you will enable and test a system-assigned managed identity.

A system-assigned managed identity allows Azure resources to authenticate to the Azure Key Vault without storing credentials in code. Once you enable system-assigned managed identities, all permissions are granted via Azure Role-Based Access Control (RBAC).

Create an Azure VM with a system-assigned managed identity

To begin, launch the Azure portal and create a virtual machine that uses Windows Server 2016 Datacenter. Enable System-assigned managed identity and then use Remote Desktop Protocol (RDP) to connect to the virtual machine and verify its availability.

Grant permissions to a managed identity

For the provided Azure resource group, you need to assign the LOD Reader role to the virtual machine. To do this, go to the Azure portal and navigate to the resource group blade and use the Access Control (IAM) page to assign the LOD Reader role to the virtual machine.

Verify a managed identity access token

On the first Azure virtual machine, launch an RDP session, and open the Windows PowerShell command-line interface. Now you need to use the Invoke-webRequest cmdlet to make a request to the managed identity to receive an access token for the Azure Resource Manager (ARM) endpoint:

$response = Invoke-WebRequest -Uri 'http://169.254.169.254/metadata/identity/oauth2/token?api-version=2018-02-01&resource=https://management.azure.com/' -Method GET -Headers @{Metadata="true"}

Extract the full response, which is stored in JSON format in the $response variable, by using the following code: $content = $response.Content | ConvertFrom-Json. Then extract the ARM access token from the response by using the following code: $ArmToken = $content.access_token.

Finally, you will call ARM with the access token by using the following code, replacing SUBSCRIPTION_ID and RESOURCE_GROUP as appropriate:

(Invoke-WebRequest -Uri https://management.azure.com/subscriptions/SUBSCRIPTION_ID>/resourceGroups/RESOURCE_GROUP?api-version=2016-06-01 -Method GET -ContentType "application/json" -Headers @{ Authorization ="Bearer $ArmToken"}).content

Remove permissions from a managed identity

Finally, in the Azure portal, remove the role assignment from the provided Azure resource group on the second virtual machine. Then, you will return to the RDP session on the virtual machine with Windows PowerShell and enter the following command once more:

(Invoke-WebRequest -Uri https://management.azure.com/subscriptions/8d7ebc7f-6c63-47b5-bbdc-6df02452b2bd/resourceGroups/corp-datalod12693745?api-version=2016-06-01 -Method GET -ContentType "application/json" -Headers @{ Authorization ="Bearer $ArmToken"}).content

Now you will see the failure after the permissions are removed.

Summary Conclusion

By taking this virtual lab, you will learn how to use the Azure portal to create an Azure virtual machine with a system-assigned identity, grant permissions to a managed identity, and use Windows PowerShell to verify a managed identity access token. As a proof of concept, you will remove permissions from a managed identity to see the difference after those permissions are removed.

This course is part of a Career Path:
No items found.

Instructed by

No items found.
Provider
Cybrary Logo
Certification Body
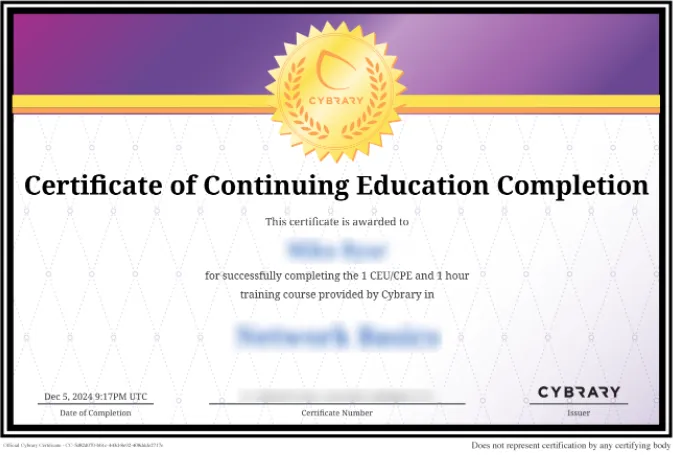
Certificate of Completion

Complete this entire course to earn a Use Managed Identities Certificate of Completion

Coming mid-July
Cybrary Reimagined.
Level up with structured, role-aligned career paths.
ALL NEW!
Cybrary Reimagined.
Celebrate Cybersecurity Awareness Month with our buy 2, get 1 offer!
Level up with structured, role-aligned career paths.
Valid until October 31. Elevate your skills today!
Start Now

Heading

Heading 1

Heading 2

Heading 3

Heading 4

Heading 5
Heading 6

Lorem ipsum dolor sit amet, consectetur adipiscing elit, sed do eiusmod tempor incididunt ut labore et dolore magna aliqua. Ut enim ad minim veniam, quis nostrud exercitation ullamco laboris nisi ut aliquip ex ea commodo consequat. Duis aute irure dolor in reprehenderit in voluptate velit esse cillum dolore eu fugiat nulla pariatur.

Block quote

Ordered list

  1. Item 1
  2. Item 2
  3. Item 3

Unordered list

  • Item A
  • Item B
  • Item C

Text link

Bold text

Emphasis

Superscript

Subscript

This is some text inside of a div block.
Share

Purpose Statement

Cybrary Career Paths are comprehensive training programs designed to prepare you for the most in-demand roles in the cybersecurity workforce. Each path follows a Learn, Practice, Prove model and includes different activity types aligned to key topics within the path’s security domain. As you progress through the path, your progress will be measured in real time using Experience Points (XP) that serve as a comprehensive capability score for each topic. Upon completing all of the requirements for a path, you will be rewarded with a shareable digital badge via Credly.
This is some text inside of a div block.
M
Time
This is some text inside of a div block.
difficulty
This is some text inside of a div block.
ceu/cpe

Overview

Heading 1

Heading 2

Heading 3

Heading 4

Heading 5
Heading 6

Lorem ipsum dolor sit amet, consectetur adipiscing elit, sed do eiusmod tempor incididunt ut labore et dolore magna aliqua. Ut enim ad minim veniam, quis nostrud exercitation ullamco laboris nisi ut aliquip ex ea commodo consequat. Duis aute irure dolor in reprehenderit in voluptate velit esse cillum dolore eu fugiat nulla pariatur.

Block quote

Ordered list

  1. Item 1
  2. Item 2
  3. Item 3

Unordered list

  • Item A
  • Item B
  • Item C

Text link

Bold text

Emphasis

Superscript

Subscript

Frequently Asked Questions
No items found.
What Will I Learn?
Foundations
Focused on the core IT competencies that cybersecurity professionals need to succeed in any career path.
Defensive Security
Focused on trying to find the bad guys. Topics such as threat intelligence, threat hunting, network monitoring, incident response. Defensive security is a reactive measure taken once a vulnerability is found through prevention, detection, and response.
Engineering and Operations
Focused on building and operating information systems.
Governance, Risk, and Compliance
Focused on the core IT competencies that cybersecurity professionals need to succeed in any career path.
Leadership and Management
Focused on program design and oversight. Covers project and program management.
Offensive Security
Focused on validating security controls by trying to break them (i.e. penetration testing or ethical hacking). Topics such as Kali Linux, metasploit, scanning, and privilege escalation. Offensive security seeks out the problem or vulnerability through ethical hacking and finds a solution to disable the operation.
Offensive Security
Focused on the core IT competencies that cybersecurity professionals need to succeed in any career path.
Path Outline

Heading 1

Heading 2

Heading 3

Heading 4

Heading 5
Heading 6

Lorem ipsum dolor sit amet, consectetur adipiscing elit, sed do eiusmod tempor incididunt ut labore et dolore magna aliqua. Ut enim ad minim veniam, quis nostrud exercitation ullamco laboris nisi ut aliquip ex ea commodo consequat. Duis aute irure dolor in reprehenderit in voluptate velit esse cillum dolore eu fugiat nulla pariatur.

Block quote

Ordered list

  1. Item 1
  2. Item 2
  3. Item 3

Unordered list

  • Item A
  • Item B
  • Item C

Text link

Bold text

Emphasis

Superscript

Subscript

Course Outline

No items found.
No items found.
No items found.

What Our Learners Are Saying

Join 3 million+ users, including 96% of Fortune 1000 companies who use our platform to upskill their teams. See what the buzz is about - start learning for free!

No items found.