TL;DR

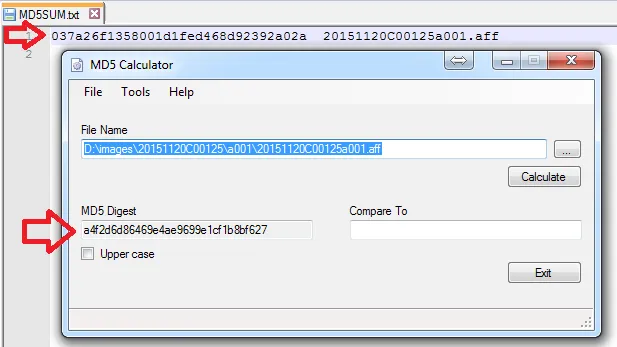
If you've not read the previous tutorial, “Creating a Forensic Disk Image Using the Guymager Utility”, please consider reviewing it as this tutorial presupposes you have an image file created using Guymager or a tool with similar capabilities.In the previous tutorial, we used the Guymager Linux utility to create a forensic image of a target disk in the open .AFF (Advanced Forensics Format) format, which can be used by a number of different forensics analysis tools.In this tutorial, we'll mount an .AFF forensic disk image created with Guymager on a Windows system using Passmark Software™'s OSFMount utility. OSFMount is available from the Passmark Software™ website at: http://www.osforensics.com/tools/mount-disk-images.htmlWhile at the website, be sure to take a look at other Passmark utilities for digital forensics. Never perform forensic analysis on the source disk, or on the original image file taken from it. Forensic analysis methods may include data recovery techniques that can alter disk contents, and it's necessary to maintain a pristine original and image verifiable using a Hash file.In this case, we have an .AFF image file taken from a source system. The source drive will have been secured in a labeled evidence pouch. Chain of custody procedures will record each time the evidence changes hands. The forensic image is also subject to chain of custody procedures to ensure admissibility of any evidence obtained by using forensic analysis.Using an ordinary method to copy a file, make a copy of the original forensic image or from a copy of the original forensic image whose integrity has already been verified using a Message Digest or Hash. This hash will not be the same as the hash of the volume created by the Guymager utility, but a hash created by the investigator of the image file.The image file should have been stored along with its metadata file and a text file containing the hash of the original image file. Make a working copy of the image file on your forensics analytical workstation. Using the hash creation utility of your choice (in Windows good choices include the md5sum command line utilities in the Cygwin package or the MD5 Calculator GUI utility). Here's a view of the MD5 Hash of the original image file juxtaposed with a freshly created MD5 hash of the new copy of the image file on the forensics analysis workstation. The hashes match, so we can be confident that the copy has not been corrupted or altered in the copying process.
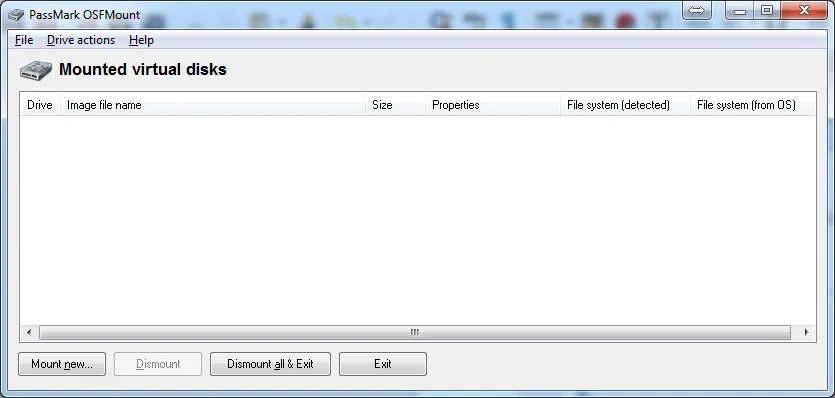
Download the OSFMount version appropriate for your Windows system (32 or 64 bit). Contemporary systems will mostly be 64 bit. Install OSFmount after downloading and run it. You'll be greeted with this screen.
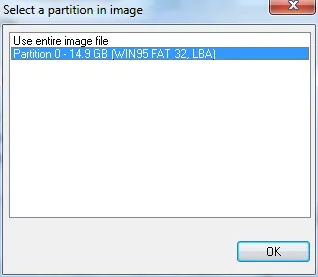
Click the Mount New button at lower left. Navigate to the directory where your verified image file is located and select it. You'll have to choose how to mount in the first popup screen. In this case, we'll choose to mount the first partition in the drive: Partition 0 (shown here) .
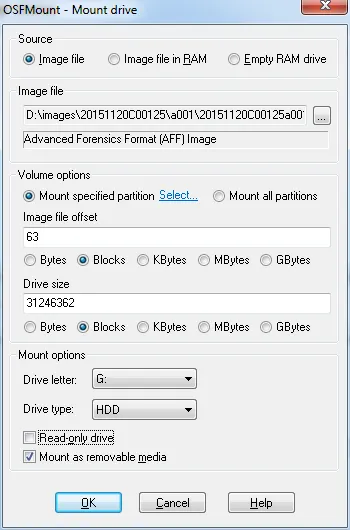
The options you choose in the next screen are almost all best left at the default setting – see OSFMount documentation for more specifics. Here, we'll accept the default drive letter G and mount the image as a hard drive. Finally choose whether to mount the image Read-only or as a removable drive. In this case, we'll be mounting a working copy of the image file we can perform analysis on. If we anticipate using data recovery tools during our analysis, choose Mount as removable media. If you choose this option, be sure you have another verified copy of the image file.
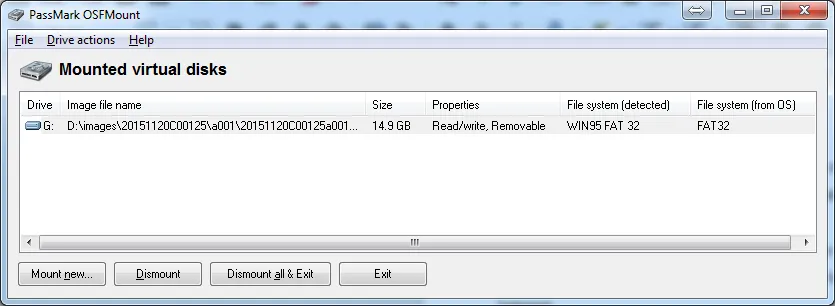
The amount of time required for OSFMount to create a virtual disk drive and mount it will depend on the size of the volume. Once mounted successfully, OSFMount will show a mounted virtual disk.
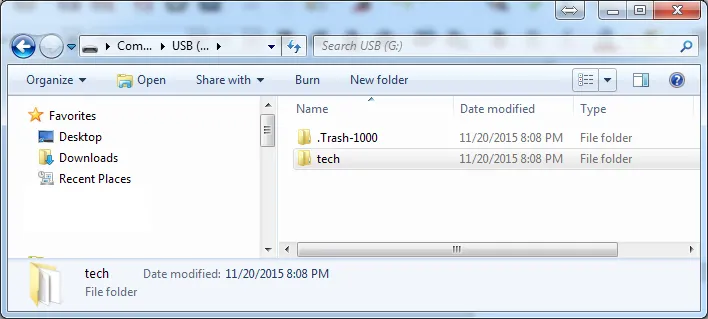
Now, you can proceed to open the mounted volume as a normal disk drive. You'll be able to see any files or folders in the root of the mounted image. Your drive image will have completely different contents than this one, which is shown for example only opened in Windows Explorer. The example drive has deleted files in the .Trash-1000 folder, which may be of forensic analytical interest.
The image file has been mounted and is ready for the investigator to analyze using forensic analytical tools appropriate to the case. The use of those analytical tools is outside the scope of this tutorial.Once analytical analysis is complete, return to the Mounted Virtual Disks screen and click on the Dismount all & Exit button. This will dismount the image and close OSFMount. After closing the file, recalculate a hash for the image file and compare with the hash of the original image file. In this case, we opened the file as a read-write file and some file contents will have changed, so the hash is now different. This image file is still fine as a working copy for analytical work, but it's no longer admissible as evidence because the file has been altered and the hash – the digital fingerprint – no longer shows file integrity.
Had the file been mounted as a read-only volume, the file would be unchanged and the hash would still be identical. Experiment with image files mounting in read-only and read-write mode to see when files are altered and when they are not. This shows why it's always necessary to work with a verified copy of the original image, which must be maintained without alteration in order to meet chain of custody criteria. This concludes the tutorial. Thank you for reading.