TL;DR
WHAT IS THE "dd" COMMAND?
dd is a command-line utility for Linux and Unix systems whose primary purpose is to convert and create low-level file copy. The dd command's syntax differs from various other Unix programs, as it uses syntax option=value rather than the standard syntax -option value or -option=value formats. By default, the dd command reads from stdin and writes to stdout; these can be modified using its input file and output file options.
The basic dd command syntax consists of the following:
1. If - This option is used to specify an input file or device 2. if - This option is used to specify an output file or device 3. bs - This option is used to specify the block size, i.e., number of bytes or kilobytes(k) or megabytes(m) 4. count - This option is used to specify the number of blocks to be copied (by default, the dd command copies the entire file or disk) 5. conv - This option is used so that the process of copying continues even if there are any read errors.
USES OF "dd" COMMAND
Some of the most common uses of the dd command are:
1. Backup the entire hard disk dd command can back up an entire copy of a hard disk to another hard disk connected to the same system. The command used for this process is:
dd if= /dev/sda of=/dev/sda
2. Backup a partition dd command can back up a partition if we specify the partition in the input file, and the output file can be the target path or image file. The command used for this process is:
dd if=/dev/hda1 of=~/partition.img
3. Create an image of a hard disk dd command can create an image file of the hard disk and save it on other storage devices. The command used for this process is:
dd if=/dev/hda of=~/hdadisk.img
4. Restore using the hard disk dd command can restore a hard disk containing the image file of another hard disk. The command used for this process is:
dd if=hdadisk.img of=/dev/hdb
5. Create CD ROM backup dd command can create an .ISO file from a source file once the CD is inserted. The command used for this process is:
dd if=/dev/cdrom of=tgservice.iso bs=2048
The .ISO file is a widely used disk image format and the standard format for bootable media. (Linux anyone?) Here is a quick and easy way to make a bootable USB from a .ISO file, with no 3rd party apps required. Here are the terminal commands in order, followed by explanations of what they do: Note: You'll need to be an administrator to do this.
BASIC REQUIREMENTS FOR CREATING A BOOTABLE USB
Here is a list of some basic requirements before we start the process:
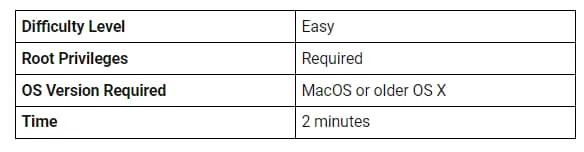
PROCESS
The steps to create a bootable USB from an ISO using dd command are as follows:
STEP 1: Create disk image with dd command $ diskutil list

This command is used to list out all disk drivers and their volumes. Drives are labeled as disk0, disk1, disk2, etc. Volumes are labeled disk1s0, disk1s1, disk1s2, etc. For our purposes, we only care about the drive. In this case, we are going to assume our flash drive is disk2.
STEP 2: Unmount the disk $ diskutil unmountDisk disk2

The "unmountDisk" command is used to unmount all volumes of the given disk drive but will keep the drive itself visible to the computer (instead of the eject option that disconnects it entirely).
STEP 3: Create the disk image with dd
$ sudo dd if=/Users/kyle/Downloads/Linux.iso of=/dev/disk2 bs=8m
"sudo" tells the system to use root level (that is the system's highest level) privileges to perform the following action .dd copies data in blocks rather than on a file-by-file basis (this is why it's so fast), and this command gives you the option to set how big each block is. 8MB (megabytes) block size has consistently worked well for various users. The command will not show any progress until it's done, but one can press CTRL+T for status updates. With an average computer, this takes less than 5 minutes to complete.
STEP 4: Eject the disk
$ diskutil eject disk2

Once the process is completed, the USB drive can be safely removed. Now the USB drive is ready to use. Assuming that the iso is EFI-compatible, one can reboot the MacBook to test it.